How do I process a new shipment?
Key Features of Shipment Creation
- Guided Step-by-Step Workflow: Each stage of the shipping process is clearly outlined to help ensure no detail is missed.
- Multi-Carrier Support: Choose from USPS, UPS, FedEx, or DHL, and compare live rates for the best value.
- Flexible Packaging Options: Use carrier-supplied or custom packaging, with automatic dimension and weight handling.
- Address Validation: Ensures delivery accuracy for both domestic and international destinations.
- Immediate Label Generation: Create and print your shipping label instantly after payment confirmation.
- Receipt & Tracking Integration: Automatically provides tracking information and printable receipts.
Helpful Tip
If you make a mistake during any step of shipment creation, simply click the relevant step at the top of the screen or use the Edit buttons on the right side of each section in Step 4: Payment & Confirmation before submitting.
Part One - Confirmation of Shipping Items
The first step is to confirm that the items you're shipping are in your possession, and that you will be generating the shipping label and sending the package yourself.
Important Notice: This is NOT a shipment request through your PostScan Mail inbox. This method allows you to pay for and print your own shipping labels, using your own packaging!
Please note: PostScan Mail Shipper is designed for generating shipping labels for items you currently have in your possession. It is not intended for use with items stored in your PostScan Mail virtual mailbox. Be sure that the items you are shipping are physically with you before proceeding.

Part Two - Shipper and Recipient Information
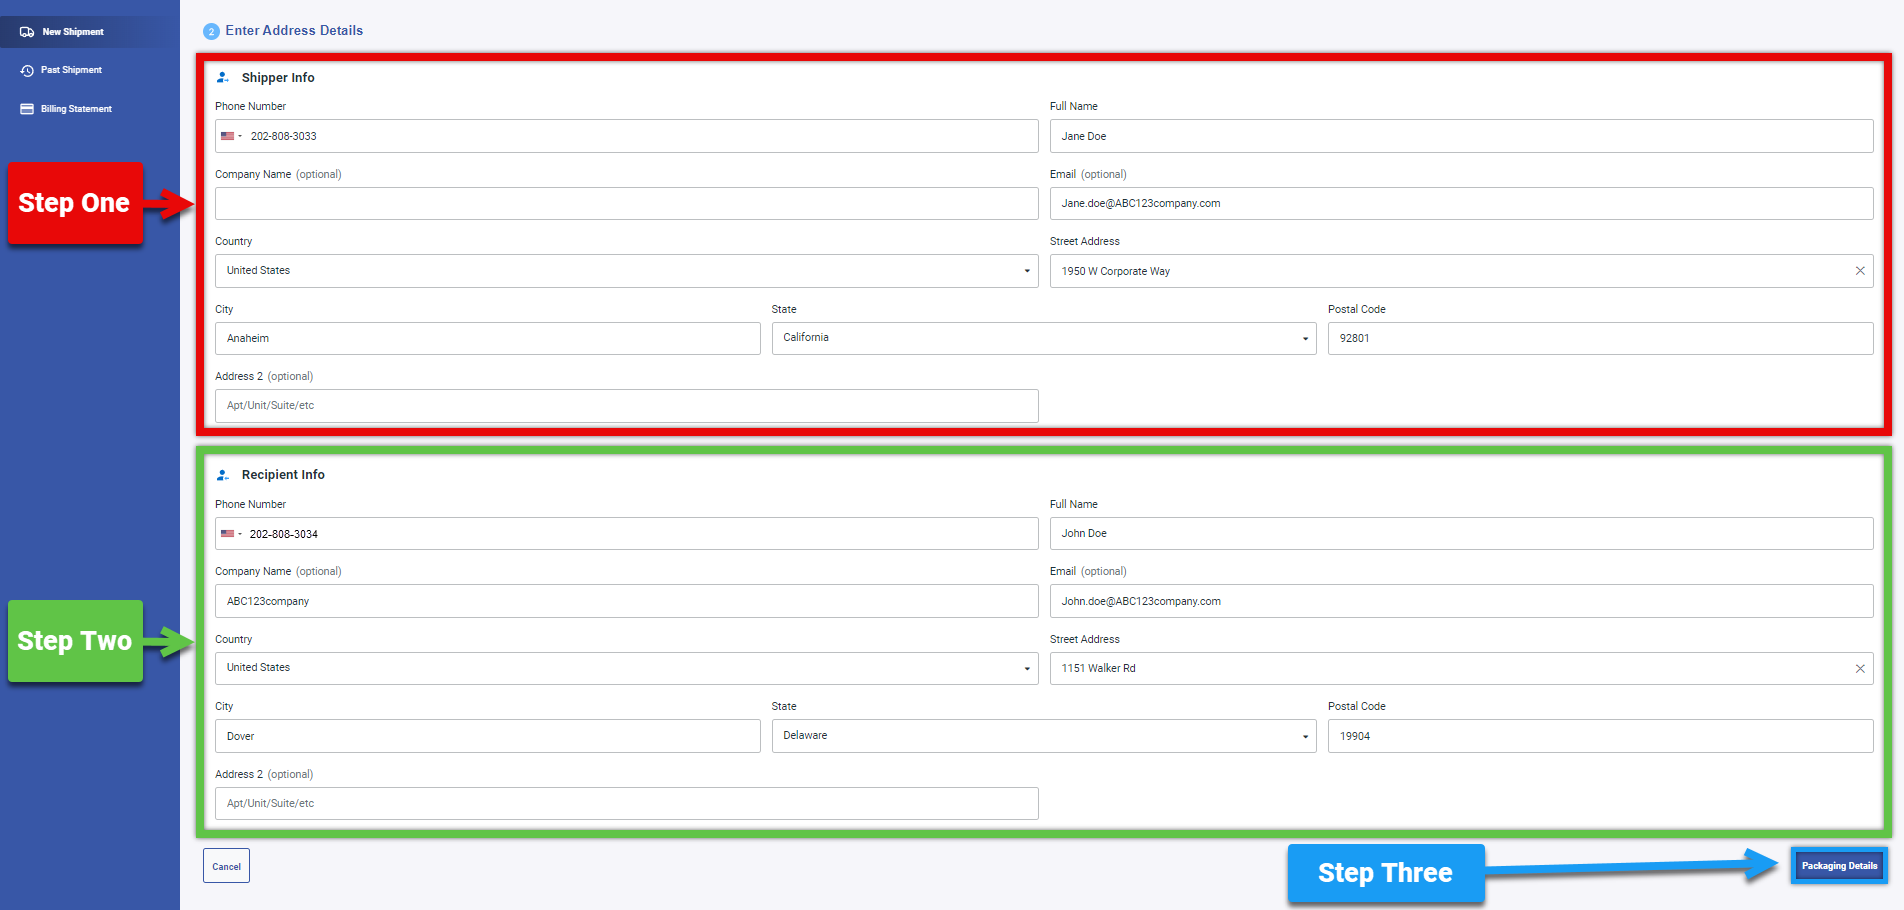
Step One - Fill out the information for the Shipper of the mail items, highlighted in RED.
Note: Any required information will show a red boarder and state that it needs to be filled out before continuing.
Step Two - Fill out the information for the Recipient of the mail items, highlighted in GREEN.
Note: Any required information will show a red boarder and state that it needs to be filled out before continuing.
Step Three - When all the information is entered correctly, click the Packaging Details button to continue to the next part.
Part Three - Custom Packaging

Custom Packaging - If you are using custom packaging select the tab at the top of the screen, highlighted in RED.
Custom Packaging Mail Type - If you selected custom packaging enter in the Mail Type in the section highlighted in BLUE.
Custom Packaging Weight - If you selected custom packaging enter in the Weight of the mail item, highlighted in YELLOW.
Carrier Packaging - If you are using Carrier Packaging select the tab highlighted in GREEN. An example of this screen will be displayed on the next part.
View Shipment Methods - If you chose Custom packaging and have correctly enter in the required information, select the View Methods button. This is highlighted in RED at the right of the screen. You can also skip Part Four and move on to Part Five.
Part Four - Carrier Packaging
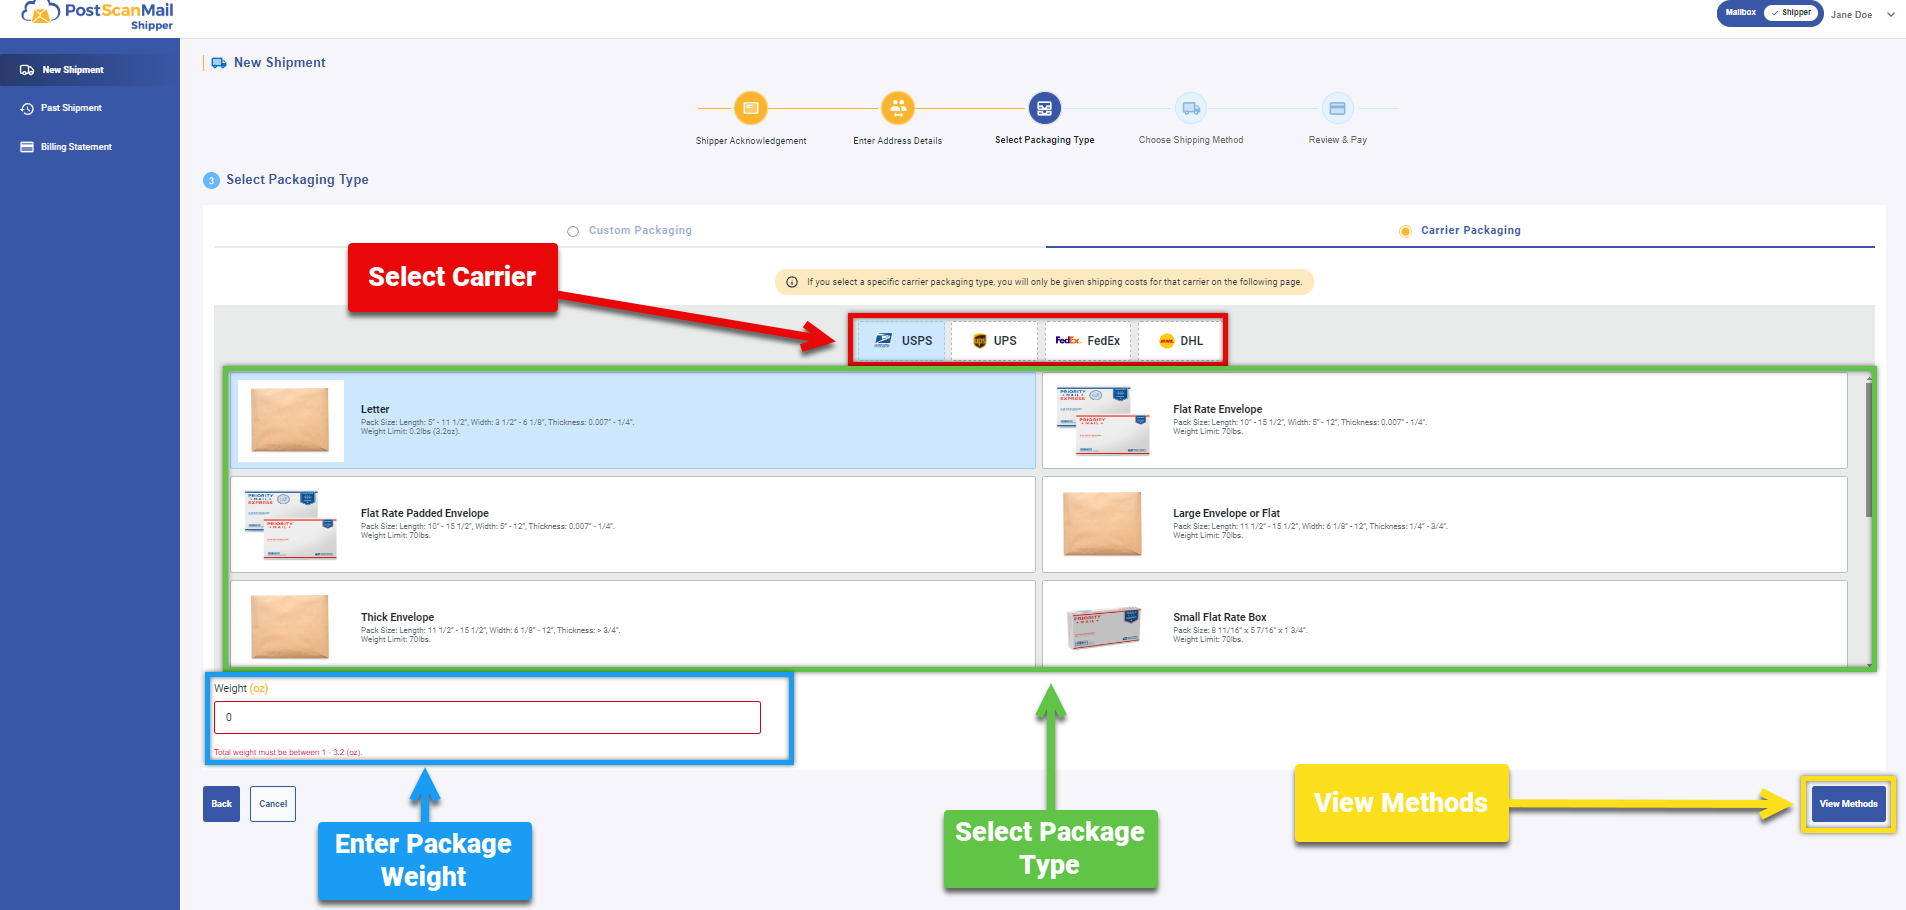
Select the carrier for shipping, highlighted in RED.
Select the Package Type you are using, highlighted in GREEN.
Enter in the Weight of the package, highlighted in BLUE.
Note: The maximum Weight Limit is listed on each Package Type.
When all the information is entered correctly, click the View Methods button to continue to the next part, highlighted in YELLOW.
Note: If you select a specific carrier packaging type, you will only be given shipping options and costs for that specific carrier on the next page.
Part Five - Selecting the Shipment Method & Carrier

Select the Carrier, highlighted in RED.
Note: If you selected a specific carrier packaging type, you will only be given that carrier as an option on this page.
Select your preferred shipping method, highlighted in GREEN.
Once the shipment method has been selected, click Proceed to Payment, highlighted in BLUE.
Part Six - Confirmation Screen
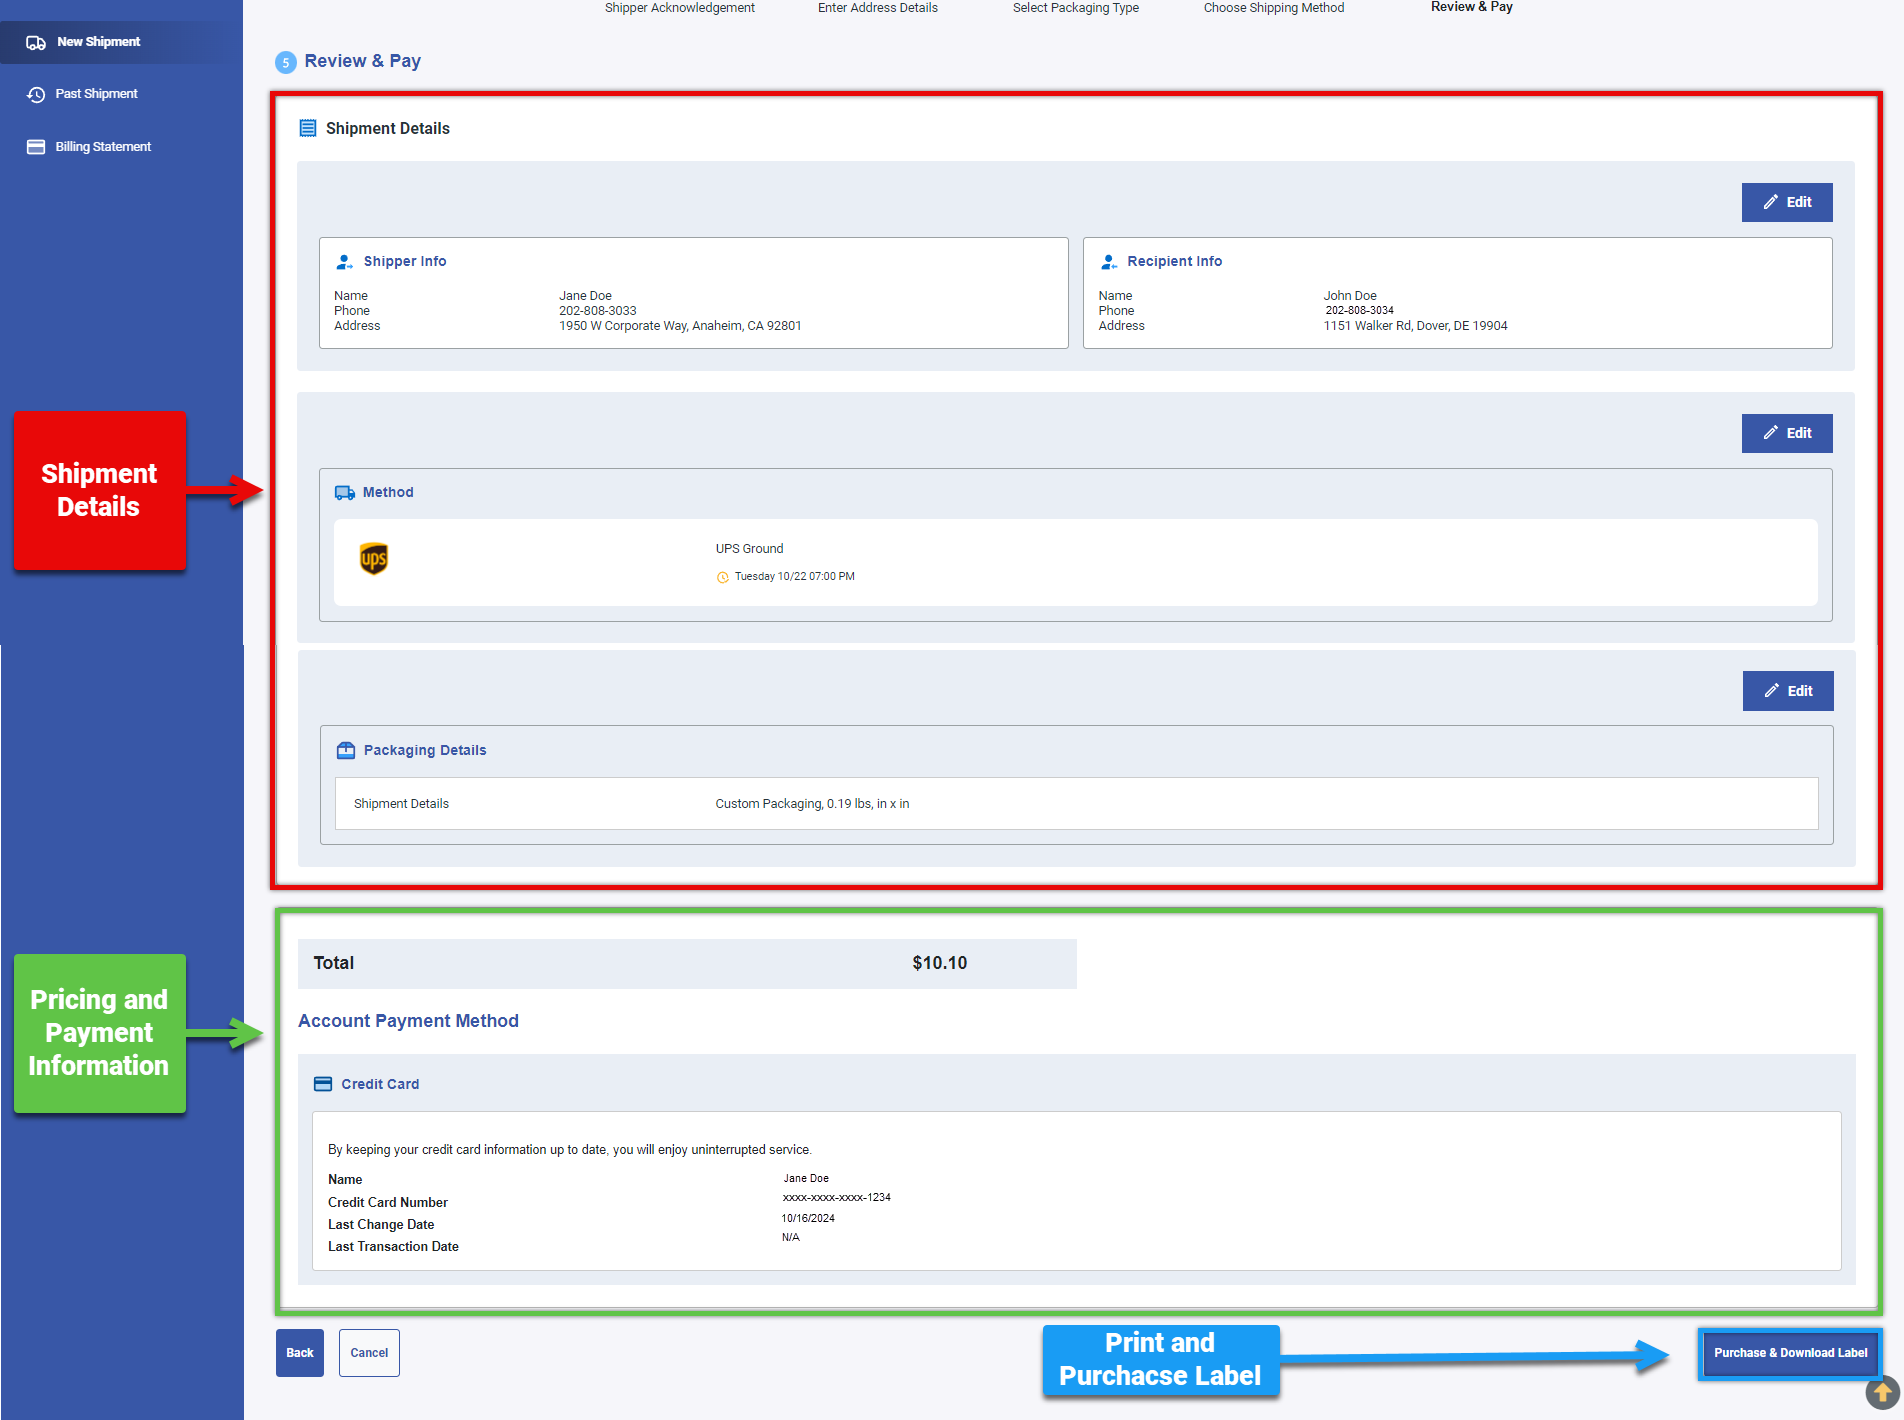
Within the box highlighted in RED, you can edit any information about the Shipment Details.
Within the box highlighted in GREEN, you can see Pricing and Payment information.
When everything looks correct, select the Print and Purchase Label button highlighted in BLUE to complete the new shipment. Now you can print your label for your package and send it out.